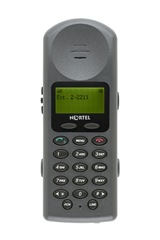
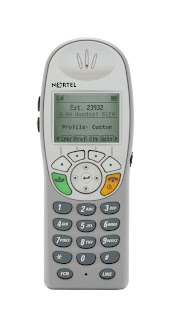
 The purpose of this post is to outline how to properly configure a Nortel WLAN 2210/2211 Wireless Handset to connect over a wireless LAN to a Nortel Succession Call Server.
There is a cradle and software available to ease/speed the configuration but for this post we’ll assume that we only have the phone itself and not the configuration cradle or additional software.
Note: If you are going to be supporting and/or installing dozens of these phones I would strongly suggest that you purchase the configuration cradle (you can download the software from Nortel’s site).
In this example the Nortel 2211 WLAN phone will be configured to connect to a TN on a Nortel Succession 1000 v4.5 Call Server over a Motorola 5100 Wireless LAN Switch using WEP encryption. A Nortel 2245 Wireless Gateway is needed in order to connect to a Succession Call Server. Within the DHCP server a scope has been setup with the vendor class of “Nortel-221x-A” which will return the vendor specific DHCP options required by the Nortel WLAN phones.
With the wireless handset powered OFF, simultaneously press and hold the Power On / Start Call and Power Off / End Call keys.Release the Power On / Start Call key, then release the Power Off / End Call key. The first option on the Admin Menu displays.
Press the Up, Down, and Select side buttons, and the softkeys on the wireless handset to scroll through the menu options.
An asterisk (*) next to an option indicates that it is selected.
— Press the Up/Down buttons to display the previous/next menu items.
— Press the Select button to select the menu option or item.
Alternatively, press the OK softkey to select the menu option or item.
— Press the Save softkey to save the entry.
— Press the Bksp key to backspace when editing the entry.
— Press the Up softkey to return to the previous menu level.
— Press Cncl to cancel the entry and return to the previous menu level.
— Press the Exit softkey to exit the menus.
The Admin menu should open with the following options below:
I.P. Addresses
0=Edit, FCN=Up
Scroll down the menu to the ESS ID option:
ESS ID
0=Edit, FCN=Up
Select “0” from this option to configure the ESSID value.
Current ESS ID:
Not learned yet
Scroll down this menu until the select displays “Static Entry” and select “0” to enter a value.
Enter the value proper ESSID of the WLAN you’ll be trying to connect to, when finished select the Power Off/End Call button to SAVE
Select the “FCN” button to move back up a menu level.
Scroll down to the “License Mgmt” option
License Mgmt
0=Edit, FCN=Up
Select “0” to edit the license mgmt option and scroll through the option until you reach “010”.
Set Current [010]
0=Select, FCN=Up
Select the “FCN” button to move back up the a menu level.
Scroll down the menu to the “Security” options:
Security
0=Select, FCN=Up
Select “0” to enter the Security options and then scroll down until the following option appears;
WEP
0=Select, FCN=Up
Select WEP by entering “0” into the phone;
Authentication
0=Edit, FCN=Up
Select Authentication by entering “0” into the phone;
Open System
0=Select, FCN=Up
Scroll down until your reach the “Open System” option and select it by entering “0” into the phone. Proceed back up the menu be hitting the “FCN” button then scroll down the menu until you reach the “WEP On/Off” option, select “0”;
WEP On/Off
0=Select, FCN=Up
Scroll down the menu until the “WEP On” option appears as below and enter “0” to select this option;
WEP On
0=Select, FCN=UPKey Information
0=Edit, FCN=UpDefault Key 1
Current Key:Key Length
0=Edit, FCN=Up128 bit
0=Select, FCN=UpKey #1
Key #2
Key #3
Key #4
Enter the Default Key number and actual WEP key for the ESSID you’re trying to connect to. After this initial configuration the phone should connect to the WLAN and pull additional DHCP configuration options and should perform any firmware uploads if any are required.
***DO NOT POWER OFF THE PHONE WHILE THE FIRMWARE IS BEING UPDATED ***
Once the phone completes the upgrade it will reboot and should present a display similar to below;
Connect Svc
Node: _ _ _ _
TN: _ _ _ . _ _ . _ _ . _ _OK BKSp Cler Cncl
From here you’ll need to configure the node and TN information for this specific phone.
Cheers!

