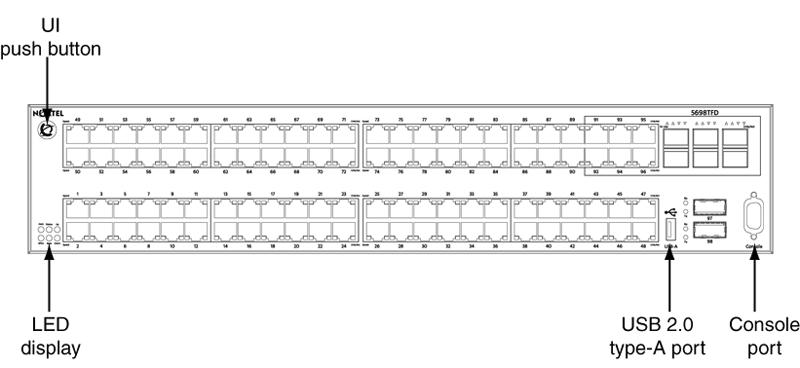
[ad name=”ad-articlebodysq”]A front panel-mounted button on some switch models that you can use for easy stacking configuration. The UI button is supported on the Ethernet Routing Switch 5000 Series of switches. That was the definition of the term “User Interface button (UI button)” from the Nortel Ethernet Routing Switch 5000 Series Terminology document although I have a better definition. A front panel-mounted button that is completely useless for anything other than providing end-users the ability to crash the network.
You can guess where I’m going with this one right? I’ll spare everyone the story… although here’s what the little devil of a button can do according to the documentation.
Assigning IP parameters using the UI button
- Press and hold the UI button for 3 seconds.
The unit will now be in configuration mode. The Status LED will now change to a blinking green status. - Press the UI button 5 times.
The Base LED and the Up and Down LEDs will now be steady amber to indicate that the button press was recognized. - Press the UI button and hold in for 3 seconds to confirm the command.
The In-Use IP address will now be changed to 192.168.192.168. The color and status of the Status LED will turn to steady green once the command has been accepted. If the command is rejected, the Status LED turns amber blinking. - Initial IP configuration using the UI button is now complete.
To continue with switch configuration, access the switch through the NNCLI, Web-based Management Interface, or Device Manager.
Setting a base unit using the UI button
- Press and hold the UI button for three seconds.
The unit is now in configuration mode. The color and status of the Status LED turns to blinking green. - Press the UI button once.
The Base LED is illuminated and the Up and Down LEDs are off to indicate that the button press was recognized. - Press and hold the UI button for three seconds to confirm the command.
The Status LED returns to a steady green state to confirm command acceptance. If the command is rejected, the Status LED moves to a blinking amber state.
Setting non-base units using the UI button
- Press and hold the UI button for three seconds.
The unit is now in configuration mode. The color and status of the Status LED turns to blinking green. - Press the UI button twice.
The Base LED will turn off and the Up and Down LEDs are turned off. - Press and hold the UI button for three seconds to confirm the commands.
Resetting a stack using the UI button
- Press and hold the UI button for three seconds.
The unit is now in configuration mode. The color and status of the Status LED turns to blinking green. - Press the UI button three times.
The Base, Up, and Down LEDs will move to a blinking amber state and blink in unison. - Press and hold the UI button for three seconds to confirm the command.
Abandoning a command
- Wait approximately twenty seconds after entering the command (without confirming it) and the input is ignored.
- Exit configuration mode by pressing the UI button nine or more times.
Note: Wait sixty seconds after the last configuration change before resetting the unit. The system can take up to this long to save configuration changes to the NVRAM. Stacks can be reset immediately after the last configuration change without any loss of information.
I’ve already added the following command into my default configuration template, “no ui-button enable” and I’ll be reconfiguring every ERS 5500/5600 series switch we have installed. I would strongly suggest that folks disable this feature. If you haven’t seen the button there’s a picture of it below, the Nortel logo is the actual button.
Cheers!
