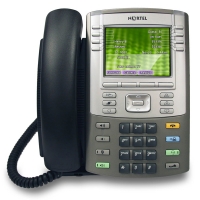
 I’ve been incredibly busy the past three months designing a new secondary Data Center while also designing a new Computer Room for a physical move of our office. With our office move we’ll be getting all new Avaya 1120e IP Phones, about 140 of them, along with a new CS1000E. In previous large scale IP phone deployments we had to “stage” the IP phones by manually configuring them and upgrading them to a version of software that supported LLDP-MED. Thankfully the IP phones now come with a version of software that supports LLDP-MED as well as Avaya’s zero touch provisioning which is going to save us a lot of time and effort.
I tested the process Friday and it worked as advertised. Here’s how I set everything up… please bare in mind there are many many ways to set this up so the following example is just how I decided to set everything up.
Avaya Ethernet Routing Switch 5520s
I configured the edge/closet Avaya Ethernet Routing Switch 5520s running software release 6.2.4 exactly as I’ve previously documented in this blog post. We’ll be using ADAC/LLDP-MED to assign the IP Phones a voice VLAN and to set the proper QoS tags.
DHCP – Infoblox
With that done I turned my efforts toward DHCP. I created a DHCP range in the voice VLAN with two special settings. I created a filter on the IP range to check for the DHCP vendor option “Nortel-i2004-A”. This will help make sure that only IP phones are provided an IP address from this DHCP range. Next I added DHCP option 244 with the following value,
Nortel-i2004-B,prov=http://10.1.20.1/avaya/sitea;
That’s all I did for the DHCP component, the magic comes in the next step.
HTTP/TFTP Server
In my example I used a CentOS Linux server at 10.1.20.1 which had Apache running with a directory structure of /var/www/html/avaya/sitea. In that folder I had the following files; system.prv and sitea.prv (this file was actually blank). You can deploy the provisioning files via HTTP or TFTP. You can utilize Microsoft’s IIS or whichever web server you’re more comfortable with. Please refer to the references listed at the end of this document for additional steps to get IIS to recognize the .prv files
Here’s what I put in the system.prv file;
file=zdt;
zone=sitea;
s1ip=10.1.2.40;
p1=4100;
a1=1;
r1=10;
s2ip=10.1.2.40;
p2=4100;
a2=1;
r2=10;
vq=y;
vcp=3;
vmp=4;
vlanf=y;
pc=y;
pcs=a;
pcd=a;
dq=n;
lldp=y;
stickiness=y;
cachedip=n;
igarp=n;
I chose to configure the Avaya IP Phones around a geographic basis. Within each location all the IP phones are configured identically but the settings can vary from location to location depending on the model and on the actual CS1000E for that site. I chose to break them down using different directories and then set DHCP option 244 to the appropriate directory for that site. In one voice VLAN the DHCP server might return “Nortel-i2004-B,prov=http://10.1.20.1/avaya/sitea;” but in another voice VLAN the server might return “Nortel-i2004-B,prov=http://10.1.20.1/avaya/siteb;” Utilizing the different directories allows me an easy way to control the different settings per geographic location. It also makes troubleshooting much easier and straightforward.
Testing
With everything setup I preceded to test my configuration. I unboxed a new Avaya 1120e IP phone and connected it to Avaya Ethernet Routing Switch 5520. The IP phone powered up and appeared to pull a DHCP address from the voice VLAN – I believe the factory configuration now has LLDP-MED enabled by default, that’s the only way the Avaya IP phone would have gotten a DHCP address from the voice VLAN. I purposely didn’t create any DHCP ranges in the data VLAN just to see how the Avaya IP phone would react. With an IP address the IP phone read the DHCP option 224 and proceed to download system.prv, sitea.prv and 00AABBCCDDEE.prv (the MAC address of the actual IP phone). After reading the provisioning files the IP phone rebooted itself and eventually came back up to a NODE and TN prompt which was expected. Once the technician entered the NODE and TN the IP phone upgraded itself to the version of software that we had loaded on the CS1000E. It rebooted again and came right up without any additional intervention.
You can eliminate technician needing to enter the NODE and TN information by creating REG entries with the MAC address of the IP phone and the NODE and TN information in the provisioning files – you can find additional information regarding the REG entries in the references below. Since this is a greenfield installation I thought it would be more work to actual document the MAC address of each IP phone than it would be if the technicians just went cube to cube configuring the proper NODE and TN information for each user.
Cheers!
References;
Avaya IP Phone Fundamentals for Communication Server 1000
Avaya IP Telephony Deployment Technical Configuration Guide